Cheques
This section shows you how to review payroll calculations, create, print, modify, void, and delete pay cheques.
After you have save all of the calculations needed for this payroll, and have clicked “Proceed to Pay” on the Calculate Pay screen, it will bring you to the Cheques section of Pay Cycle, which is broken up into two Tabs: Review/Create Cheques and Print/Modify Cheques.
Review/Create Cheques Tab:
This Tab will enable you to review your calculations and create the payroll cheques.
Only the employees whose calculated pay has been saved on the Calculate Pay screen will appear on the list. If you do not see the employee you want, go to the Calculate Pay screen and make sure that the employee’s pay has been saved. Employees whose pay has been saved are indicated by a dollar sign ($) in front of their names, which will be in “green” text, on the Calculate Pay screen.

Reviewing Calculations before you Create a Cheque:
You can review the calculations you have saved in one convenient report.
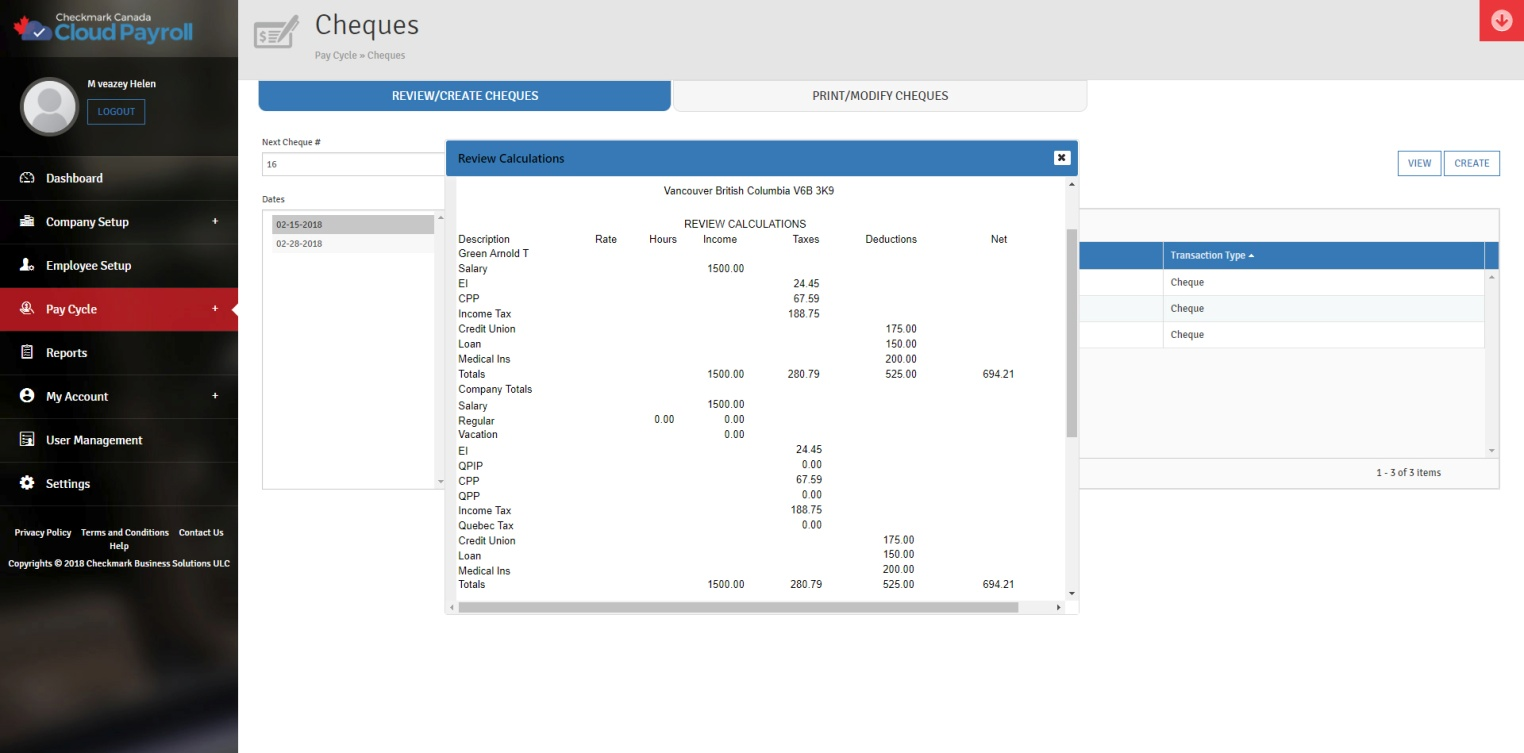
To Review the saved calculations before you Create a Cheque, follow these steps:
- Click on the Tab for Review/Create Cheques under the Cheques section of Pay Cycle.
- Select the cheque Date you want to review.
- Check the box next to each employee you want to review the calculations for.
-
- You can select a consecutive or a non-consecutive series of employees.
- If you want to review all of the employees in this pay period, you can click on the top checkbox to check all of the listed employees.
- If you do not have any employees selected, it will generate the report for all employees.
- Click “View.”
From here, you can print or save this report for future reference.
If any information is incorrect, you must return to the Calculate Pay screen, undo the calculation, and make the changes. For more information on calculating pay or undoing calculations, see “Calculate Pay” on page 64.
Creating Cheques:
After you have calculated the pay for the pay period with the Calculate Pay screen, you can use the Review/Create Cheques Tab in the Cheques section of Pay Cycle to create the payroll cheques. Once cheques are created, CheckMark Online Payroll (Canada) updates employee records with the new cheque information.
You can create one cheque at a time or all of them at once.
To Create Cheques, follow these steps:
- Click on the Tab for Review/Create Cheques under the Cheques section of Pay Cycle.
- Check the checkbox next to the employee’s name who you want to create the cheque for.
- You can select a consecutive or a non-consecutive series of employees.
- If you want to create all of the listed employees cheques at once, you can click the top check box to select all of the employees in the list.
- Change the Next Cheque # and/or the Direct Deposit Cheque #, if necessary.
- When creating multiple cheques, CheckMark Canadian Payroll Cloud consecutively assigns cheque numbers starting with the cheque number that has been entered first.
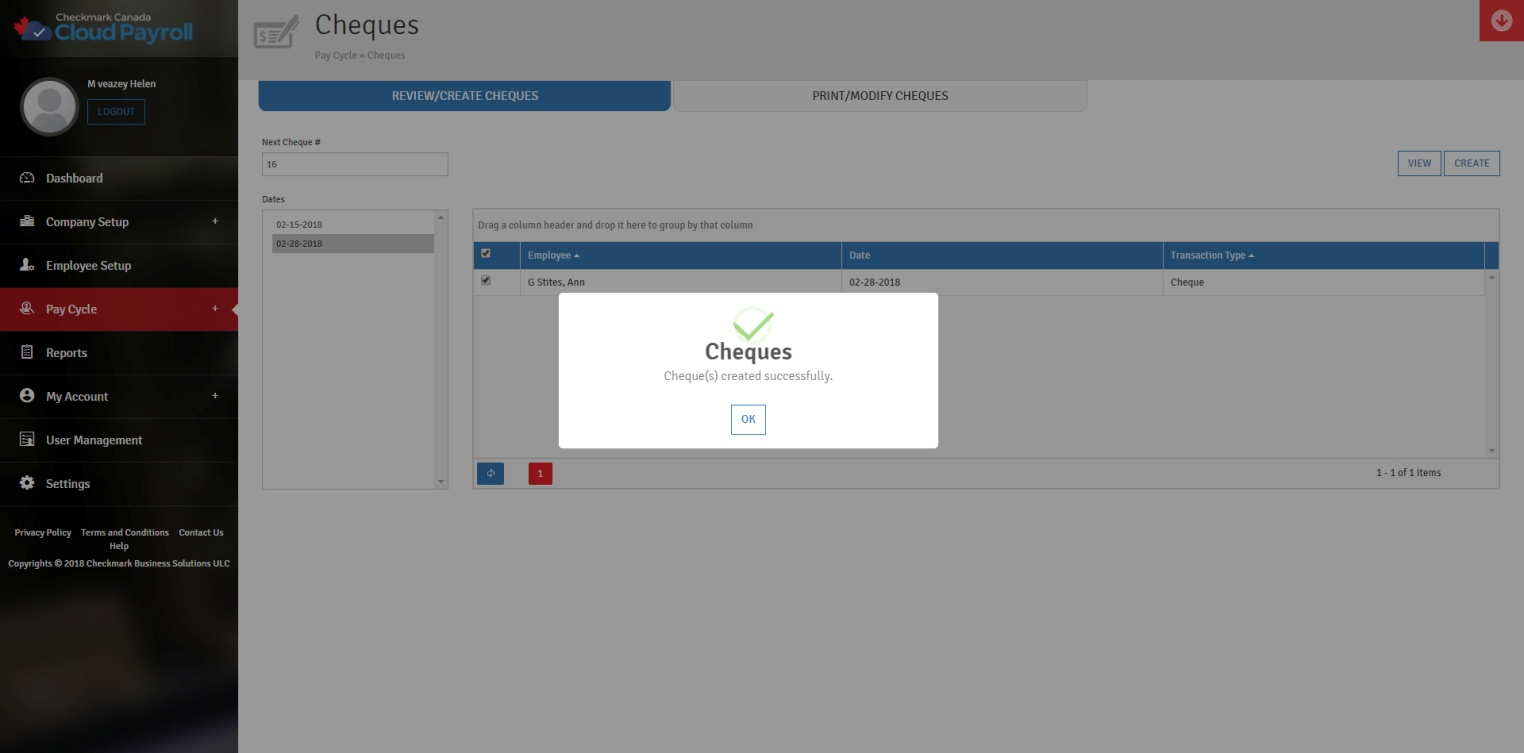
- Click “Create.”
- Approve the payroll on the Payment Confirmation screen.
- Confirm the pricing at the top of the page.
- Choose to pay with the credit card on file or add a new card.
To add a new card, follow these steps:- Choose the radio button for Use a different credit card.
- Select the Card Type.
- Enter the Credit Card Number.
- Enter the Expiration Date and the Security Code.
- Enter the Name on the Card.
- Check the checkbox for “Save Credit Card” if you want to save this credit card for future use.
- Edit the Billing and/or Shipping Addresses, if applicable.
- Click on “Edit.”
- Enter the new information.
- Check if the Shipping Address is the same as the Billing address.
- Click “Update.”
- Check the box for “I have reviewed the payroll summary and want to approve payroll.”
- Click “Approve Payroll.”
After you have approved the payroll, you will be directed back to the Review/Create Cheques Tab, the employees’ names for which cheques have been created will no longer appear in the list, and the Next Cheque #/Direct Deposit # will show your next available cheque number. You will also receive an email confirmation of your payment.
Once created, a cheque’s calculations cannot be changed. However, you can use the Print/Modify Cheques Tab to edit/modify the cheque number, convert a direct deposit to a cheque, and delete or void the cheque.