Setting Up Items
There are two ways to set up items in MultiLedger Canada:
- You can set up a new item while you are entering an Item Purchase, provided there is at least one other item set up already. When you reach the Items pop-up list on Item Purchases, click New. You can then set up information for the item. If you set up an item using this method, you do not have to enter values for Qty on Hand, Total Cost, or Last Unit Cost, because they will be entered automatically when you save the Item Purchase.
- You can set up a new Item Setup. Setting up a new item in this manner is described below.
Entering New Items
- Click Item Setup in the Command Center
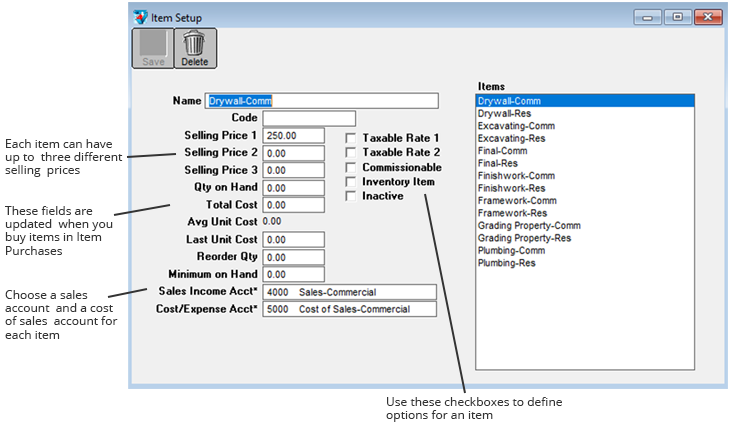
- Enter the item’s name and press TAB.
Note: You can use an optional code field to sort or classify items. For details, see “Codes for Customers, Vendors, and Items” on page 100.
- Enter any other relevant item information.
See “Item Setup Field Descriptions” on page 63 for more information and tips.
- Click Save.
The item name is added to the list on the right.
Modifying Item Information
To modify existing item information, first select the item name from the list, then modify the relevant item information, or your changes will be lost.
Important: Any changes made to values on the Items window do not affect account balances in the General Ledger. To change the Qty on Hand value for an item and adjust the General Ledger balances, use Adjust Inventory. For more details, see “Adjust Inventory Window” on page 216.
Deleting Items
You can delete items provided no outstanding invoices are associated with the item exist.
- Click Item Setup in the Command Center.
- Select the item from the list.
- Click the Delete button.
Important: After deleting an item, you can no longer obtain any reports for that item.
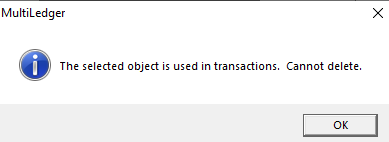
If you try to delete an Item that has outstanding invoices, the following message appears:
Important: Because of restrictions with the multi-user capabilities of MultiLedger Canada, you must be the only user accessing the company files to delete an item.
As an alternative to deleting an item, you can mark an item as inactive by checking the Inactive box on the item setup window. See “Item Setup Field Descriptions” on page 63.