Hour Categories
You can have up to seven hour categories for your company, all of which can be used by any employee.
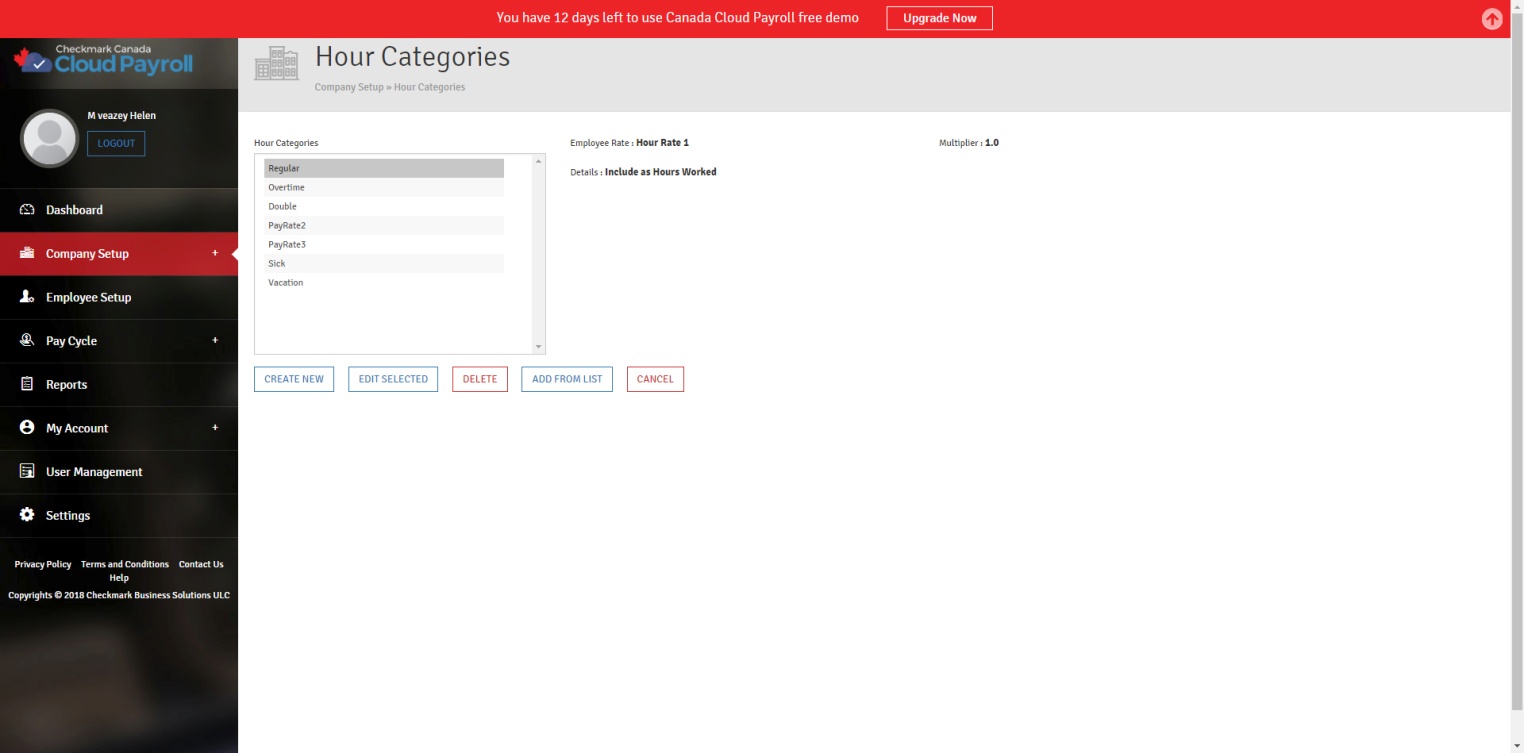
Once defined on the Hour Categories screen, under Company Setup, an Hour Category appears on the Enter Hours and Calculate Pay screens. Accrued Hour Categories, such as “Sick,” are assigned to employees in the Employee Setup screen.
*Note – The order of your Hour Categories is determined by the order in which they are put into the system. Once the Hour Categories have been entered, the only way to change the order would be to delete them and re-enter them in the order you want. Due to this, you should be very careful as you enter your Hour Categories; you might want to set them up according to their frequency of use, with the most frequently used Category appearing first in the list.
*Note – Hour Categories should not be modified once they have been used, either by entering them in the Employees YTD Tab or by Cheque. This could adversely affect balances.
CheckMark Online Payroll (Canada) comes with several pre-defined Hour Categories, including:
- Regular
- Overtime
- Double
- PayRate2
- PayRate3
- Sick
- Vacation
- Comp
- Holiday
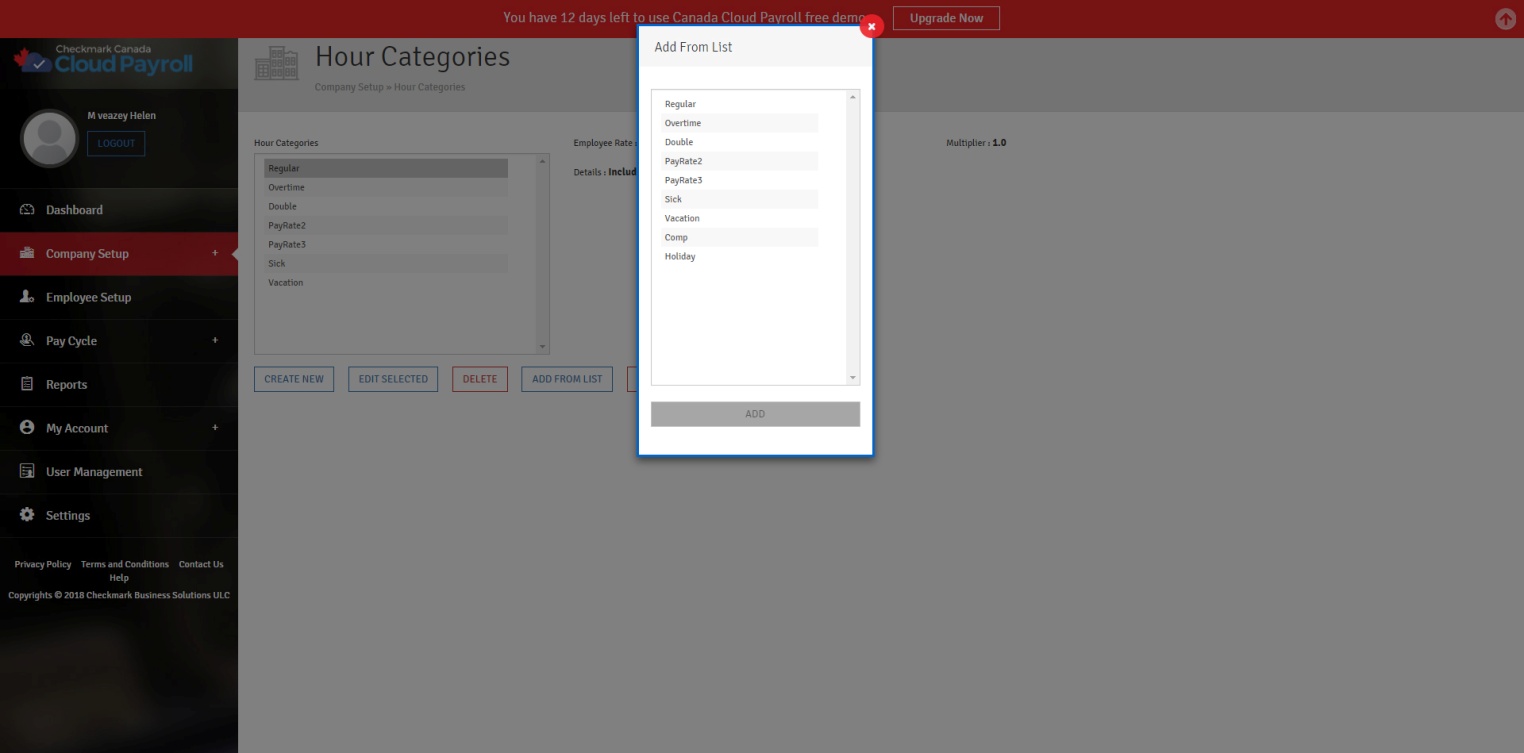
Click “Add From List” to see a complete list.
You can add a pre-defined Hour Category to your Company and use it as is or change it to fit your needs.
Adding a Pre-Defined Hour Category to your Company:
- To add a pre-defined Hour Category/Categories, follow these steps:
- Click “Add From List.”
- Select the Hour Category/Categories you want.
- Click “Add” to add the Hour Category/Categories to your list of Hour Categories.
Creating a New Hour Category:
If you need an Hour Category that is not included in the pre-defined list, you can use the Create New” button.
Once you are in the Create New Hour Category screen, you will see several fields:
Hour Category Field Descriptions:
Hour Category: Enter the name of the Hour Category.
Employee Rate: Use this radio button to select which Hour Rate should be associated with the Hour Category. The actual Hour Rate amount depends on the Hour Rates set up for each employee on the Employee Setup screen.
Multiplier: Use this radio button to select the Multiplier, which will be used to multiply the employee’s hourly rates.
For Example: If you set it up for “Overtime”, with 1.5 Times Rate as the Multiplier for the Hour Category, then when one of your employees works overtime, you can put in the number of overtime hours into the “Overtime” Hour
Category and it will automatically calculate the overtime dollar amount to be 1.5 times the employee’s Hour Rate. So if the employee makes $8.00 an hour, it would calculate at $12.00 an hour for “Overtime” (1.5*8=12).
Include as Hours Worked: Check this option if the hours in this Category should be included for Additional Income, Other Deduction, and/or Accrued Hour Category calculations based on Hours Worked.
Vacationable: Check this option if the Hour Category should be included as income for calculating Vacation Pay.
Not Subject to EI: Check this option for hours that are not eligible for Employment Insurance. Typically, you would not use this option unless you have employees who have Native Indian Status.
To add a new Hour Category, follow these steps:
- Click “Create New.”
- Type in the name of the new category.
- Assign the appropriate Employee Rate and Multiplier.
- Check if you want it included as Hours Worked, Vacations, and/or Not Subject to EI, then save.
Editing/Modifying an Existing Hour Category:
You should not edit/modify an existing Hour Category if it has already been used on a cheque or any employees have amounts for it in their YTD Tab. To make a change to the Hour Category mid-year, stop assigning hours to the Category when you input hours. Then, create a New Category with the correct set up and use it moving forward.
To edit/modify an existing Hour Category, follow these steps:
- Select the Hour Category from the List of Hour Categories.
- Click the “Edit Selected” button.
- Make the necessary changes.
- Click “Update” to Save.
Deleting an Existing Hour Category:
As long as the Hour Category has not been used for any cheques, nor has any information been entered for it in the YTD Tab in the Employee Setup, you can delete it at any time.
To delete an Hour Category, follow these steps:
- Select the Hour Category from the List of Hour Categories.
- Click “Delete.”
- Click “Yes, Delete It!” to confirm.