Recording Vendor Payments
When you save vendor payments as a cheque, MultiLedger Canada decreases the selected cash account and decreases your accounts payable account (as assigned on Interface Accounts) by the amount of the cheque. While an individual cheque can have only one cash account and one discount/adjustment account, you can choose different cash accounts and different accounts for any discounts or adjustments for separate cheques.
- Click Vendor Payments in the Command Center.
For field explanations, see “Vendor Payments Field Descriptions” on page 194.
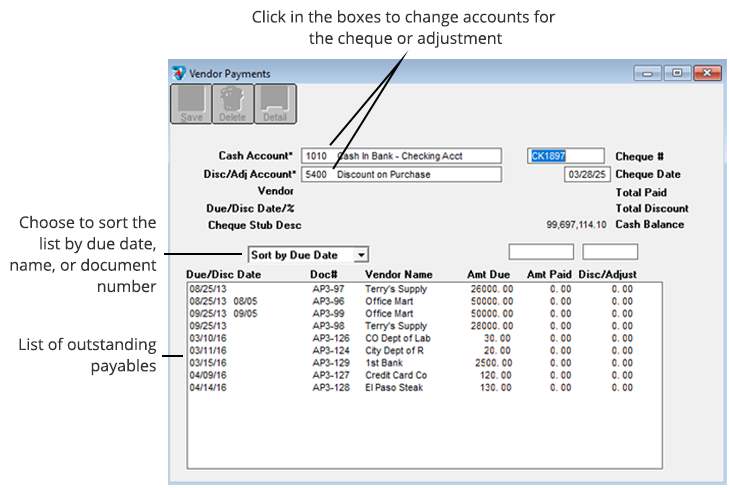
- Select a cash account for the cheque.
When you open Vendor Payments, the default cash account assigned on Interface Accounts is shown.
You can change the cash account by clicking the account number or name and selecting a new account from the pop-up list.
- If necessary, select an account for any discounts or adjustments.
You can add or change the discount or adjustment account by clicking the account number or name and selecting a new account from the pop-up list (if no account is shown, click just to the right of the Disc/Adj Acct label). Once you’ve selected an account as the Disc/Adj Acct, you can change the account, but you cannot remove it.
- If necessary, enter or change the cheque number.
After the cheque is saved, the cheque number is increased automatically by one.
- Verify that the cheque date is correct.
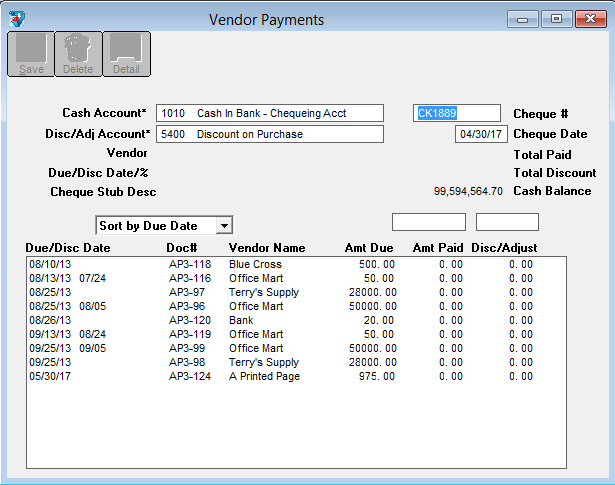
- Select the outstanding payable.
You can select an outstanding payable by clicking it or by using the Find command under the Edit menu.
You can sort the outstanding payables by date, name, or document number by clicking the appropriate Sort by drop-down option
When you select an outstanding payable, the vendor name, due date, discount date, payable total, discount or adjustment (if any), and the cheque stub description (from the original payable) automatically fill in the appropriate fields above the outstanding payables list.
If the cheque date is later than the payable’s discount date, the following dialog appears:
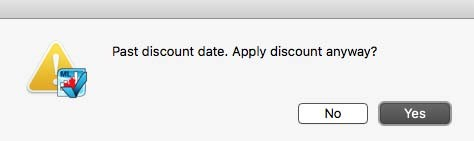
Click Yes to still apply the discount to the amount due. Click No to not apply the discount.
Note: To apply full payment quickly without any discount or adjustment, hold down the Control key (Ctrl) on Windows or the Command key (⌘) on Macintosh while you click the outstanding payable. The amount due will be listed automatically as the amount paid. You thus go to step 9, skipping steps 7 and 8.
- If necessary, edit the highlighted amount in the Amt Paid edit box to match the actual vendor payment and press TAB.
The cursor moves to the Disc/Adjust edit box:
- If necessary, change or enter any discount amount or adjustment and press TAB.
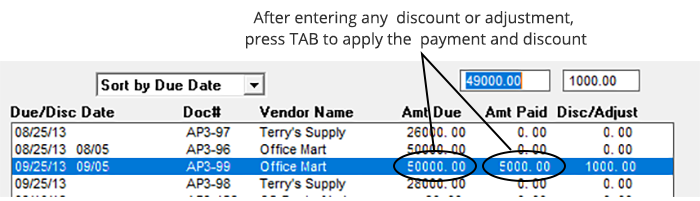
After the payment and discount are applied, the payment is added to the Total Paid field for the cheque, the discount is added to the “Total Discount” field, and the Save button is enabled.
Note: If you find that you’ve made a mistake, you can correct it easily before saving the cheque. See “Modifying or Deleting Payments Before Saving a Cheque” on page 198.
- After repeating steps 6–8 for each outstanding payable that you’re paying, click Save.
A cheque is created for each vendor that you’re paying. For example, if you selected two payables for Office Mart and three payables for Bats Distribution and Saved, two cheques are created; one for Office Mart for the total of their two payables and one for Bats Distribution for the total of their three payables.
When you save the cheque, the Total Paid amount and any discounts or adjustments decrease the accounts you selected.
Note: If you discover a payment error after saving the cheque, see “Modifying or Deleting Payments Before Saving a Cheque” on page 198.
Modifying or Deleting Payments Before Saving a Cheque
If you’ve made a mistake (such as entering a payment incorrectly or entering a payment for the wrong payable), you can quickly fix the problem before saving the cheque:
- Select the appropriate outstanding payable.
- Change the highlighted amount paid (or press DELETE or BACKSPACE to remove it), then press TAB.
- If necessary, change the amount in the Disc/Adjust field (or press DELETE or BACKSPACE to remove it), and press TAB to re-enter the modified payment (or remove the old one) on the line.
Modifying or Deleting Payments After Saving a Cheque
When you create a cheque in Vendor Payments, MultiLedger Canada uses the Disbursements Journal to post the cheque to the general ledger. You can use the Disbursements Journal to modify or delete the cheque that contains the incorrect vendor payment. Vendor Payments and the general ledger will be updated automatically to reflect the change.
To modify or remove a payment from a saved cheque:
- Click Disbursements Journal in the Command Center, then click Modify.
A list of cheques for the month selected in the pull-down menu appears. Please note that the list of cheques also contains any cheques created in the Disbursements Journal. Select the cheque from the transactions list. If the cheque you’re looking for doesn’t appear, you may have to select another month from the pull-down menu.
- Modify the payment amount for a detail line or enter 0.00 in the Amount edit box to remove a payment from the cheque.
- Press TAB to replace the detail line in the list.
- Click Save.
The outstanding payable associated with the payment will again appear in Vendor Payments.
If you delete a cheque that was made using Vendor Payments from the Disbursements Journal, all the vendor payments that made up the cheque will again appear in the Vendor Payments.
For more details about modifying transactions, see “Modifying or Deleting Payments Before Saving a Cheque” on page 198.