Formatting Cheques, Invoices, Statements & Deposits
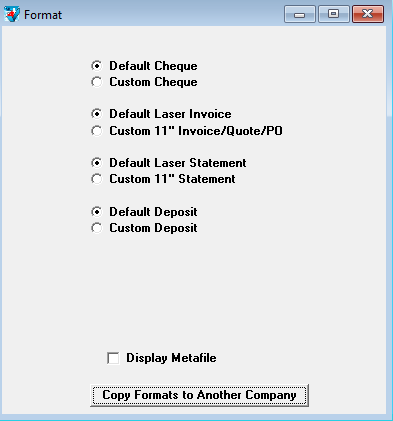
The Format window under the File menu is used to position print fields for cheques, invoices, purchase orders, quotes, customer statements, and deposit slips. You can position print fields for any compatible printer.
Print fields for the Default items have been positioned to fit forms from Checkmark’s Forms division. (Forms can be ordered by calling 604-283-7084 or online at https://www.checkmarksolutions.ca)
You might want to customize the position of print fields for the following reasons:
- You need to fine-tune the preset print fields for your specific printer.
- You want to print on pre-printed forms other than those made by Checkmark Forms.
- You want to print forms saved as metafiles (Windows) or PDF/ PICT Files (Macintosh). Metafile is a Windows-based format, and a PICT File is a Macintosh-based format for a graphics document created by many graphics programs. PDF files can also be used on the Macintosh version of MultiLedger Canada.
Customizing Print Field Positions for Your Printer
The initial positions of the print fields for Custom options are based on Checkmark Forms. To customize the preset print fields for your printer or to create a format other than that used by Checkmark Forms, do the following:
- Click the appropriate “Custom” radio button.
Clicking the Custom 11″ Invoice/Quote/PO radio button opens the following formatting window:
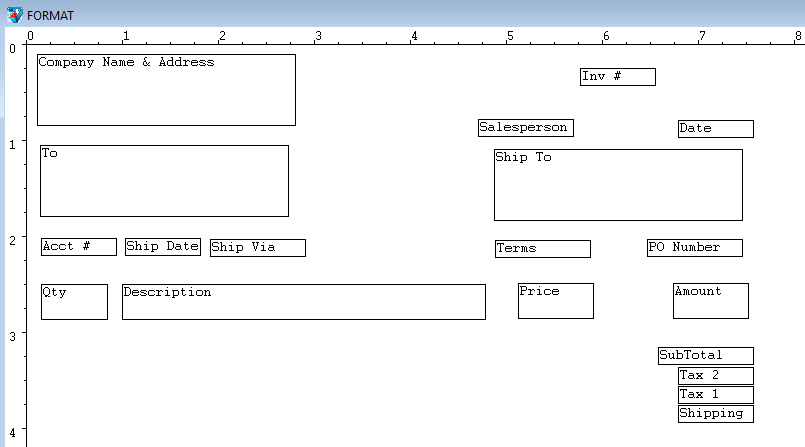
- Drag the print fields to their new positions.
Select a group of print fields by dragging over the fields or by holding down the SHIFT key while clicking individual fields. Moving one of the fields moves the entire group.
To restrict movements to vertical positioning, hold down the Alt key (Windows) or the OPTION key (Macintosh) while dragging the field or fields.
To restrict movements to horizontal positioning, hold down the Ctrl key (Windows) or Command key (⌘ – Macintosh) while dragging the field or fields.
You can use the arrow keys to move the fields.
Note: Double-click a field to activate or deactivate. If the field label is red, it is inactive.
- When you are finished repositioning the print fields, click the window’s close box.
The following dialog appears:
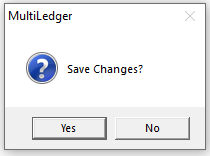
- Click Yes to save the changes you made to the print field positions. Click No to return to the Format window without saving any position changes.
Note: To return any custom format to its original settings, hold down the Ctrl key (Windows) or Command key (⌘- Macintosh) while clicking the appropriate default radio button.
Positioning Print Fields for Windows Metafiles or Macintosh PDF or PICT Files
If you’ve created your own form as a Windows metafile (.wmf) or a Macintosh PICT file (.pct) or PDF (.pdf) in a graphics program, or you want to use one of the sample metafiles, PDFs or PICTs that came on the MultiLedger Canada master disk, MultiLedger Canada can show the metafile, PDF or PICT file on your screen to help you position print fields.
MultiLedger Canada can also print the metafile, PDF, or PICT file along with the corresponding transaction information.
- Create the invoice, cheque, quote, purchase order, or customer statement form using any graphics program that can save Windows metafiles or Macintosh PDF/PICT files.
- Save the graphics file (in the graphics program) in the metafile format (.wmf) or PDF/PICT format (.pdf/.pct). You can save the metafile or PDF/PICT in the same folder that contains your company’s data files. Close the metafile or PDF/PICT file.
- Open your MultiLedger Canada company files.
- Choose Format from the File menu.
You can align the print fields according to the following directions:
- Check the Display Metafile option (Windows) or Display PDF/PICT File option (Macintosh)
- Click the appropriate “Custom” radio button.
For example, clicking the Custom 11″ Invoice/Quote/PO radio button with Display Metafile or Display PDF/PICT File checked causes a standard Open File dialog box to appear on your screen.
Note: Invoices, quotes, and purchase orders use the same format.
- Open the appropriate Metafile or PDF/PICT File.
Note On Windows: Several sample forms in the metafile format are included in the “Metafile” folder installed in the MultiLedger Canada directory.
Note On Macintosh: Several sample forms in the PDF/PICT format are included in the “Sample PDF/PICTs” folder installed in the MultiLedger Canada ƒ folder.
Your company name and address from Company Information will print on invoices and statements that use these metafiles or PDF/PICT Files. For example, if you click “11_Inv.wmf” in the scroll box and then click Open, the following formatting window would appear:
- Drag the print fields you want to reposition to their new positions.
Note: You cannot reposition the background metafile or PDF/PICT File. For example, the text “Acct#” is part of the metafile or PDF/PICT file—not a print field. To edit the text, graphics, or background for this particular metafile or PDF/PICT File, you must use a graphics program that can edit Windows metafiles or Macintosh PDF/PICT Files.
- When you are finished repositioning the print fields, close the window.
- Click Yes to save the changes you made to the print field positions. Click No to return to the Format window without saving any position changes.
Note: To return any custom format to its original settings, hold down the Ctrl key (Windows) or Command key (⌘ – Macintosh) while clicking the appropriate default radio button.
Codes for Customers, Vendors, and Items
You can use an optional code field to sort or classify customers, vendors, and items. Codes can be entered up to 15 alpha-numeric characters and are entered in the Customer, Vendor, or Item setup windows.
For example, if you want to sort vendors by an account number, you would set up a code in the code field on vendor setup, and it will show as below on all vendor lists:
C123\ACME Office Supplies
Characters up to and including the backslash (\) won’t automatically print on cheques, invoices, mailing labels, or customer, vendor, and item reports. The code, however, will appear on transaction journal reports.
Note: To have MultiLedger Canada print the codes you’ve set up for customers, vendors, and items on reports, check the “Show Code Field on Reports” option on Preferences under the File menu.