Setting Up Items
Items can be classified as inventory or non-inventory (for service sales).
- Enter the name and information for each inventory item by following the instructions, see “Setting Up Items” on page 65.
- Verify the items you set up by checking balances on an Inventory- current report.
Step 2 is explained in the following section.
Verifying the Items Setup
After entering all your inventory items, you can use an Inventory- current report to verify the setup. The total On Hand Cost for all your items should equal the general ledger balance for the inventory account. The following procedure shows you how to check these values.
- Click Item Reports in the Command Center.
- Select Inventory- current radio button.
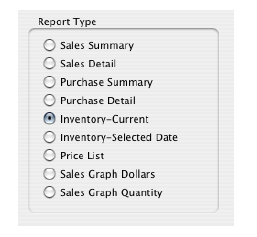
You do not need to select any inventory items from the items list. When no items are highlighted, all inventory items will be reported.
- Click View or Print.
After clicking View, a report window appears:
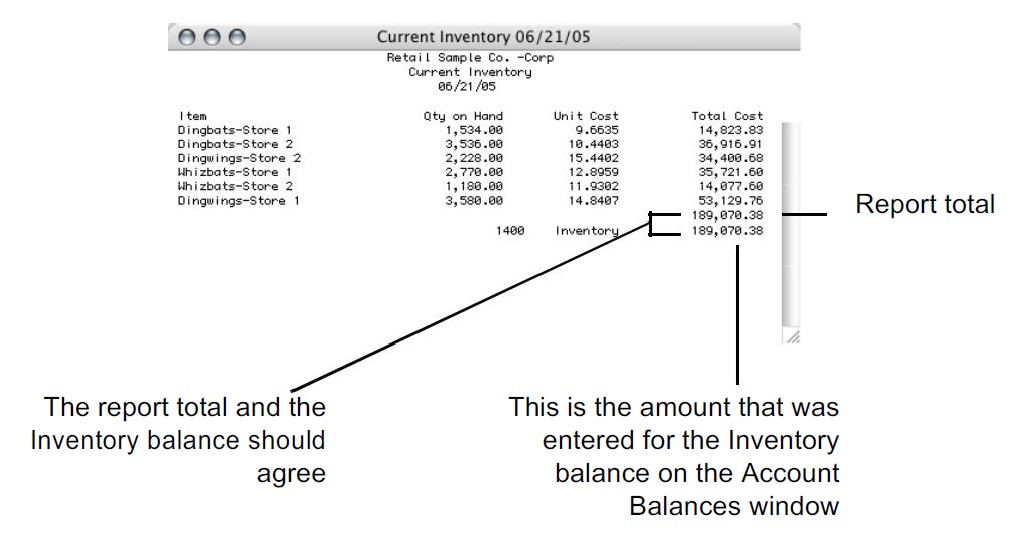
- Verify that the report total equals the “Inventory” balance listed.
These two amounts should agree.
Note: Item reports are discussed in more detail in Chapter 10, “Customer, Vendor & Item Reports.”
What to do if your inventory doesn’t balance
The following are some reasons that could cause your inventory not to balance with the Inventory ledger balance:
- An incorrect starting inventory balance was entered.
Solution: Correct the inventory balance by editing the amount in Account Balances. - Incorrect values were entered for an inventory item.
Solution: Double-check the values entered for an item on Item Setup.