This section shows you how to Import Employee information. For information on importing hours, see “Import Hours Tab” on page 60.
You can Import Employee information into your CheckMark Online Payroll (Canada) Company.
Please note that not all of the Employee Setup Fields are available for import. You can only import the following fields:
First Name Salary per Pay Period CPP YTD
Last Name Hour Rate 1-4 QPP YTD
Street Pay Periods Per Year Choice Income Tax YTD
City Hire Date Quebec Tax YTD
Province Last Raise Date Job Title
Postal Code Termination Date Marital Status
Phone Number Province Choice Employment Type
Email Address Salary YTD In- Active Selection
SIN EI Wages YTD Normal Hours per Pay
Birth Date WSIB Wages YTD Vacation YTD
Department Choice EI YTD
Employee Number QPIP YTD
After you import your employee, you will need to go back through and verify that all of the information is correct, as well as the Fields that are not available for importing.
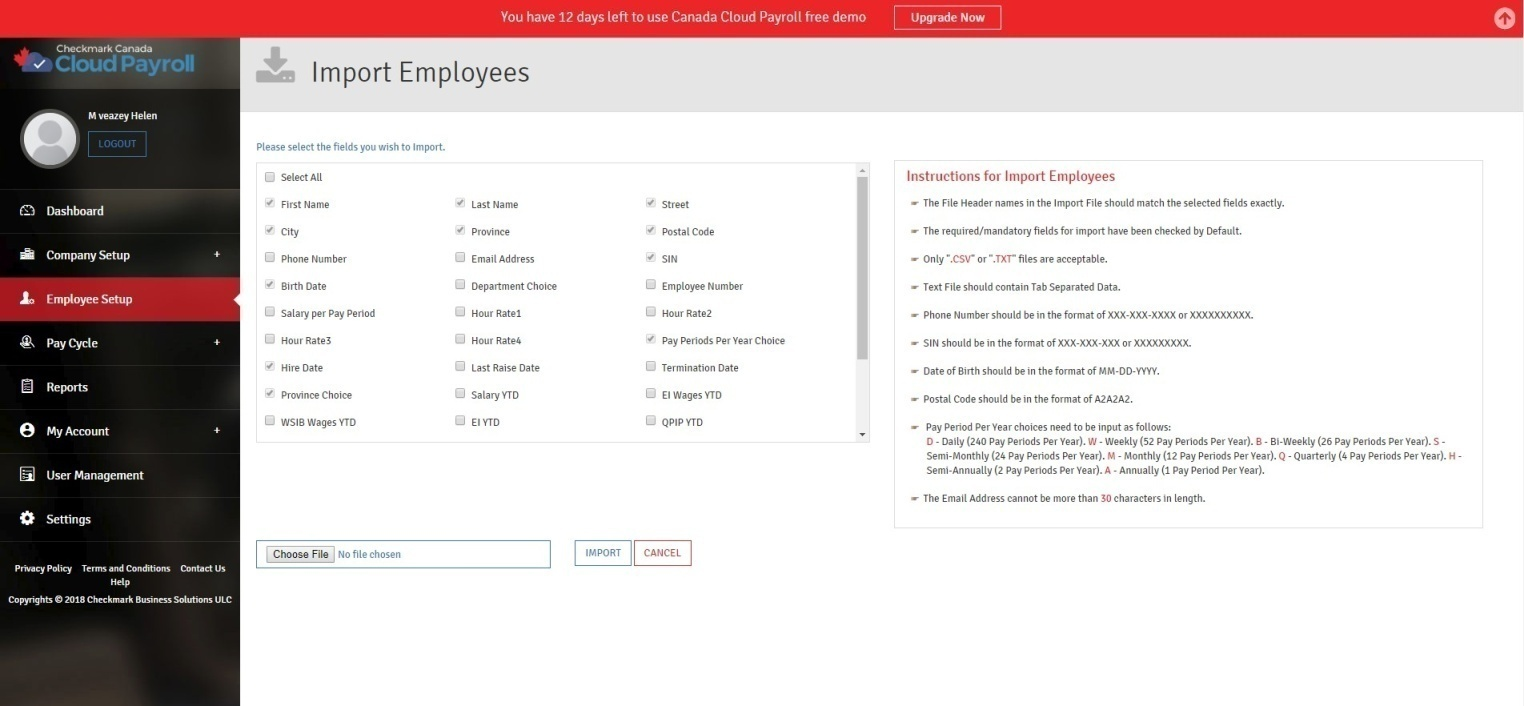
Instructions for Importing Employees:
- The employee information that you import must be in a .CSV (Comma Separated Value) or a Tab Delimited Text File (.TXT).
- If it is a Tab Delimited Text File, you need to make sure there is a tab between each Field and a return after each employee.
- The Import File needs to have Field Headers, which need to match the Field Names in CheckMark Online Payroll (Canada).
- The Import File Fields need to be in the same order as the Fields on CheckMark Online Payroll (Canada).
- The mandatory Import Fields have been selected by default.
- Phone Numbers should be in the format of “XXX-XXX-XXXX” or “XXXXXXXXXX.”
- The SIN should be in the format of ‘XXX-XXX-XXX” or “XXXXXXXXX.”
- The Birth Date should be in the format of MM-DD-YYYY.
- Pay Period per Year choices need to be input as follows:
- D = Daily (240 Pay Periods Per Year).
- W = Weekly (52 Pay Periods Per Year).
- B = Bi-Weekly (26 Pay Periods Per Year).
- S = Semi-Monthly (24 Pay Periods Per Year).
- M = Monthly (12 Pay Periods Per Year).
- Q= Quarterly (04 Pay Periods Per Year).
- H= Semi-Annually (02 Pay Periods Per Year).
- A= Annually (01 Pay Periods Per Year).
- The Email Address cannot be more than 30 characters in length.
How to Import Employee Information:
To Import Employees, follow these steps:
- Click “Import Employees” on the Employee Setup screen.
- Click on the checkbox next to each Field you want to import.
- Click “Choose File” on the bottom of the screen.
- Select the Import File (either a Comma Separated Value (.CSV) or a Tab Delimited Text File (.TXT)).
- Click “Open” after you have selected the File.
- Click “Import.”
You will then be redirected back to the main Employee Setup screen, and you will be able to view the imported employees on your Employee List.
If the import fails, you will see a message about what caused the failure at the top of the import screen.
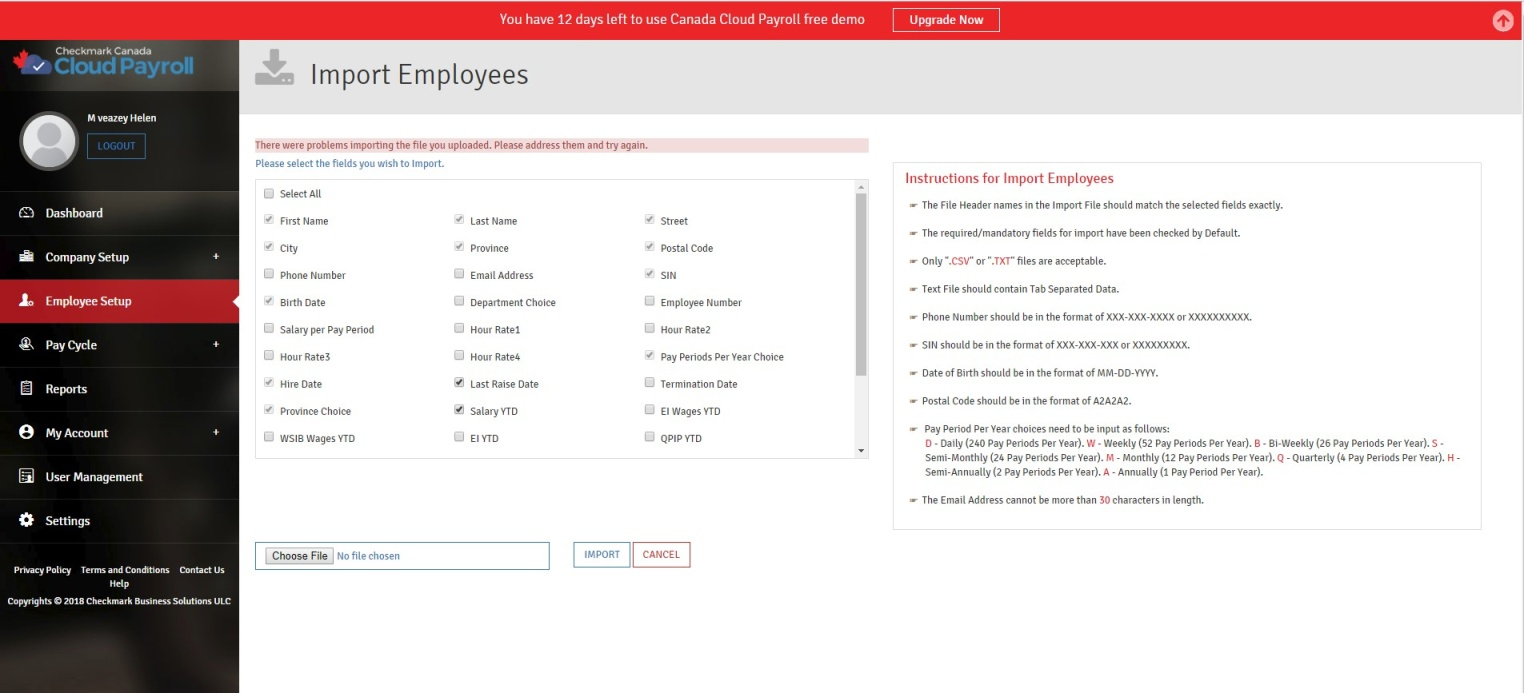
There are multiple reasons why an import file is as an incorrect File Format.
- The Import File is in an incorrect File Format.
To resolve this, make sure the Import File is in the proper File Format; either a Comma Separated Value (.CSV) or a Tab Delimited Text File (.TXT). - You have duplicate information, such as an Email Address or an SIN.
To resolve this, you will need to correct the duplicated information in the Import File. - You have an empty row in the .CSV File.
To resolve this, you will need to delete the entire empty row from the .CSV File. - Required/Mandatory Fields were not included in the .CSV/Text File.
To resolve this, you will need to make sure that all of the required/mandatory Fields are in your Import File. - A field is in the wrong format, such as the SIN or Birth Date not being in the proper format.
To resolve this, you will need to make sure all of the Fields are in the proper formats in the Import File.