Payables Journal
Use the Payables Journal to record a purchase that creates an outstanding payable that does not involve inventory. If you need to record inventory purchases, use Item Purchases.
Saving a Payables Journal document automatically updates the general ledger and creates an outstanding payable.
After the payable is created, you can use Vendor Payments to create a cheque to pay the vendor.
Note: When setting up your company with MultiLedger Canada, you should use the Payables Journal to enter outstanding payables that are dated prior to your current open months. An outstanding payable will be created without affecting the general ledger account balances. For more information, see “Setting Up Outstanding Payables” on page 38.
Payables Journal Field Descriptions
This section discusses the individual fields on the Payables Journal.
Recurring
If you have Payables Journal transactions that occur on a regular basis, you can save them with the Recurring check. You can define the frequency for a recurring entry and have MultiLedger Canada remind you when the transaction should be created. For more details on working with recurring entries, see “Recurring Entries” on page 124.
Document #
Enter a document number up to eight characters long to identify the transaction. The last character must be a number.
After the document is saved, the document number (or last number of a combination of characters) is automatically increased by one.
Vendor
Select a vendor from the pop-up list. The vendor’s name, address, and any notes set up for the vendor are entered automatically, too. If the pop-up list does not appear, vendors have not yet been set up.
You can add a new vendor or edit existing vendor information without closing the Vendors pop-up list by clicking New (Alt-N on Windows or ⌘-N on Macintosh) or Edit (Alt-E on Windows or ⌘-E on Macintosh).
Date
Simply type over the highlighted day or use the +/- keys on your keyboard to increment/decrement the date. You can enter a date from the 30 open months, provided the month isn’t locked, in the form MM/ DD/YY.
The date, along with any selected terms, determines the payable’s due and discount dates.
Due Date
Due Date, Discount Date, and Discount %, as defined on Vendor Setup, are shown under the Due Date label.
To change any of these values for a particular transaction, click the due date shown. The following dialog box appears:
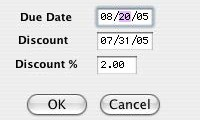
Edit any of the entries and click OK. Click Cancel to keep the original values. You can also use Vendor Setup to change the terms for the Vendor.
Important Note: You cannot enter a Due Date more than 240 days from the date of the invoice.
Cheque Stub Description
Enter a 25-character description that will print on a cheque stub when you pay for this purchase in Vendor Payments.
You could enter a vendor’s reference (invoice) number or other information to help the vendor identify the transaction when your payment is processed.
Ledger Account
Select the ledger account from the pop-up list. For more information on using pop-up lists, see “Using Pop-Up Lists” on page 112.
When you save the payable, the account entered here is increased by the amount for the detail line. Usually, this is an expense account in the 6000–8999 range.
Job
Select the job for this detail line from the pop-up list. If the Jobs pop-up list does not appear, no jobs have been set up, or Skip Jobs (Ctrl-K on Windows or ⌘K on Macintosh) under the Edit menu is checked.
Description
The vendor’s name is automatically copied and entered here, unless you have the preference selected to “Use Cheque Stub Description in Payables Journal”. If you have the preference selected, the information you entered in the Cheque Stub Description field will automatically be entered in this field. Or you can enter up to 25 characters of descriptive text for specific detail in the invoice, see “Setting Program Preferences” on page 76.
Amount
Enter an amount for the detail line. If the amount has zero cents, you don’t have to enter .00.
New Line (Windows Only)
To enter another detail line to the payable, click New Line or press ENTER.
Total
This shows the total for the payable as you add detail lines to it. When you save the payable, the Total amount increases the account assigned to Accounts Payable on the Interface Accounts.