
This section shows you how to use the Additional Income screen, under Company Setup, to set up the types of income, such as mileage or tips, that your Company uses (in addition to salary or hourly wages) to calculate an employee’s pay.
[* Note – you can assign Ledger Accounts to each Additional Income Category for transferring or posting Additional Income amounts to an accounting system.]
You can define up to 20 Additional Income Categories for your Company and assign up to four per employee.
Once defined on the Additional Income screen, the Additional Income Category appears on Income/Deductions, the Income Tab in Employee Setup, and the Calculate Pay screen.
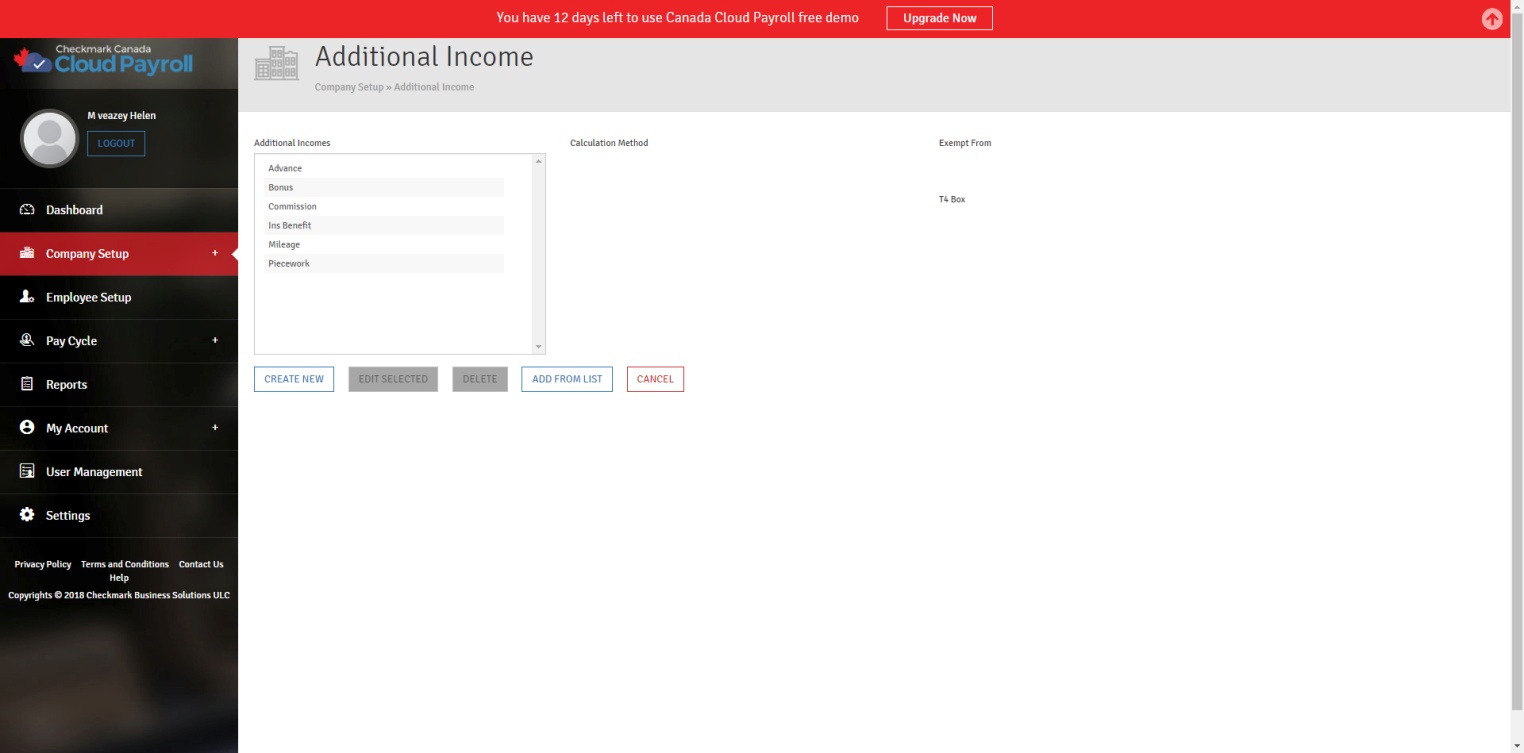
CheckMark Online Payroll (Canada) comes with several pre-defined Additional Income Categories, including:
- Advance
- Bonus
- Commission
- Ins Benefit
- Mileage
- Piecework
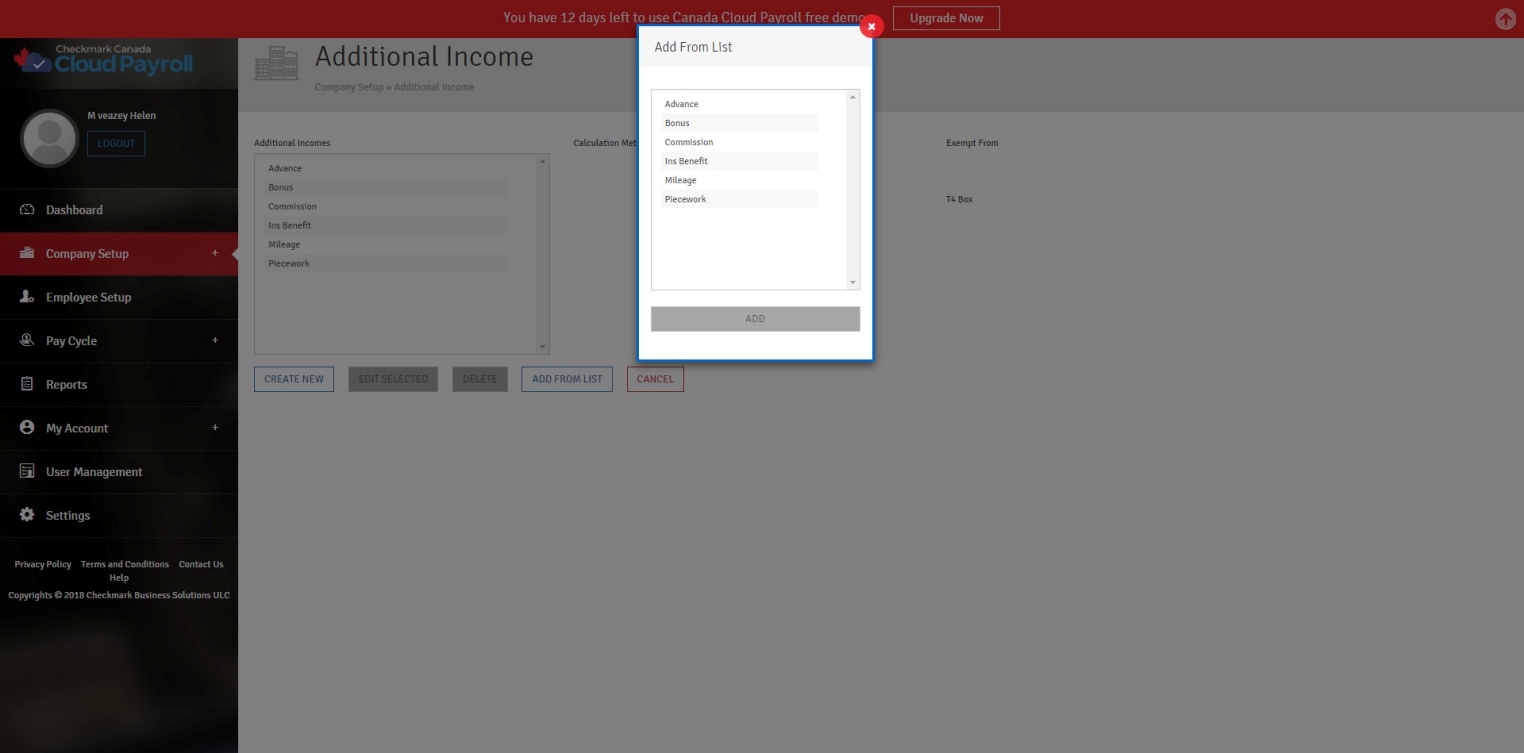
Click “Add From List” to see a complete list.
You can add a pre-defined Additional Income Category to your Company and use it as is or change it to fit your needs.
Adding a Pre-Defined Additional Income Category to your Company:
To add a pre-defined Additional Income Category, follow these steps:
- Click “Add From List.”
- Select the Additional Income/s you want.
- Click “Add” to add the Additional Income Category/Categories to your list of Additional Incomes.
Creating a New Additional Income Category:
If you need an Additional Income Category that is not included in the pre-defined list, click the “Create New” button.
You will see several fields once you are in the Create New Additional Income Category screen.
Additional Income Field Descriptions:
Additional Income: Enter the name of the Additional Income Category.
Calculation Method: When entering the values for a Calculation Method, enter the values that your Company typically uses. You can always change the values when you assign the Additional Income Category to an employee.
Variable Amount: Use this Method when you want to enter a different amount each pay period on the Calculate Pay screen.
Fixed Amount: Use this Method to add a fixed amount to an employee’s earnings each pay period or hour worked, depending upon what is selected from the drop-down list.
Fixed % of Sales: Use this Method to calculate the income, such as commission, based on a fixed percentage of sales. Enter the percentage that an employee typically earns.
For Example: If an employee typically earns a 5% commission on sales, enter “5” in the edit box. Once you have assigned the Category to an employee, you can enter the amount of sales on the Calculate Pay screen.
Mileage Amount per Mile: Enter the typical amount an employee receives for each mile driven.
For Example: If an employee typically receives twenty-nine cents ($0.29) for each mile, enter “0.29” in the edit box.
Once you have assigned the Category to an employee, you can enter the number of miles on the Calculate Pay screen.
Piecework: Enter the typical rate that an employee receives for piecework. You can enter an amount as low as $0.001 and as high as $999.99. Once you have assigned the Category to an employee, you can enter the number of pieces on the Calculate Pay screen.
Exempt From: By checking the appropriate options, you can classify an Additional Income Category as exempt from any combination of the following taxes:
-
- Fed Tax
- Prov Tax
- EI
- CPP
- QPP
- WSIB
- EHT/HSF
- QPIP
See the appropriate tax guide to determine the correct handling of individual income items.
Omit From Net: Check this option if an Additional Income Category should not be included in the net pay.
For Example: An example of this type of income is the Life Insurance portion of a Benefits package that is a taxable benefit to the employee. Income defined with the Omit from Net option checked will not post to a Ledger Account.
Non-Vacationable: Check this option if the amount for the Additional Income Category should be omitted from the Vacation Pay calculation.
Include in Wages For Dept/Job Posting: Check this option if you want the amount for the Additional Income Category included in the department or job distribution for your employee cheques.
T4 Box: Enter the appropriate T4 Box number; the Additional Income’s data should print in, if applicable.
To add a new Additional Income Category, follow these steps:
- Click “Create New.”
- Type in the name of the new Additional Income Category.
- Assign the appropriate Calculation Method.
- Check the appropriate Exempt From options, if applicable.
- Check if you want it to be Omit From Net, Non-Vacationable, and/or Included in Wages for Dept/Job posting, if applicable.
- Enter the appropriate T4 Box, if applicable, and save.
Editing/Modifying an Existing Additional Income Category:
*Important – You should not change the way the Additional Income Category is taxed once the first cheque of the Year has been created, as that could adversely affect your reports and cause corruption. To make a change to the tax setup mid-year, stop the Category from being applied by simply modifying the amount/rate to zero. Then, create a New Category with the correct tax set up to use going forward.
To edit/modify an existing Additional Income Category, follow these steps:
- Select the Additional Income Category from the List of Additional Incomes.
- Click “Edit Selected.”
- Make the necessary changes.
- Click “Update” to save.
Deleting an Existing Additional Income Category:
As long as the Additional Income Category has not been used for any cheques and has not had any information entered for it in the YTD Tab in the Employee Setup, you can delete it at any time.
To delete an existing Additional Income Category, follow these steps:
- Select the Additional Income Category from the List of Additional Incomes.
- Click “Delete.”
- Click “Yes, Delete It!” to confirm.