Use this Tab to enter information such as the employee’s name, address, SIN, employee #, and default Department.
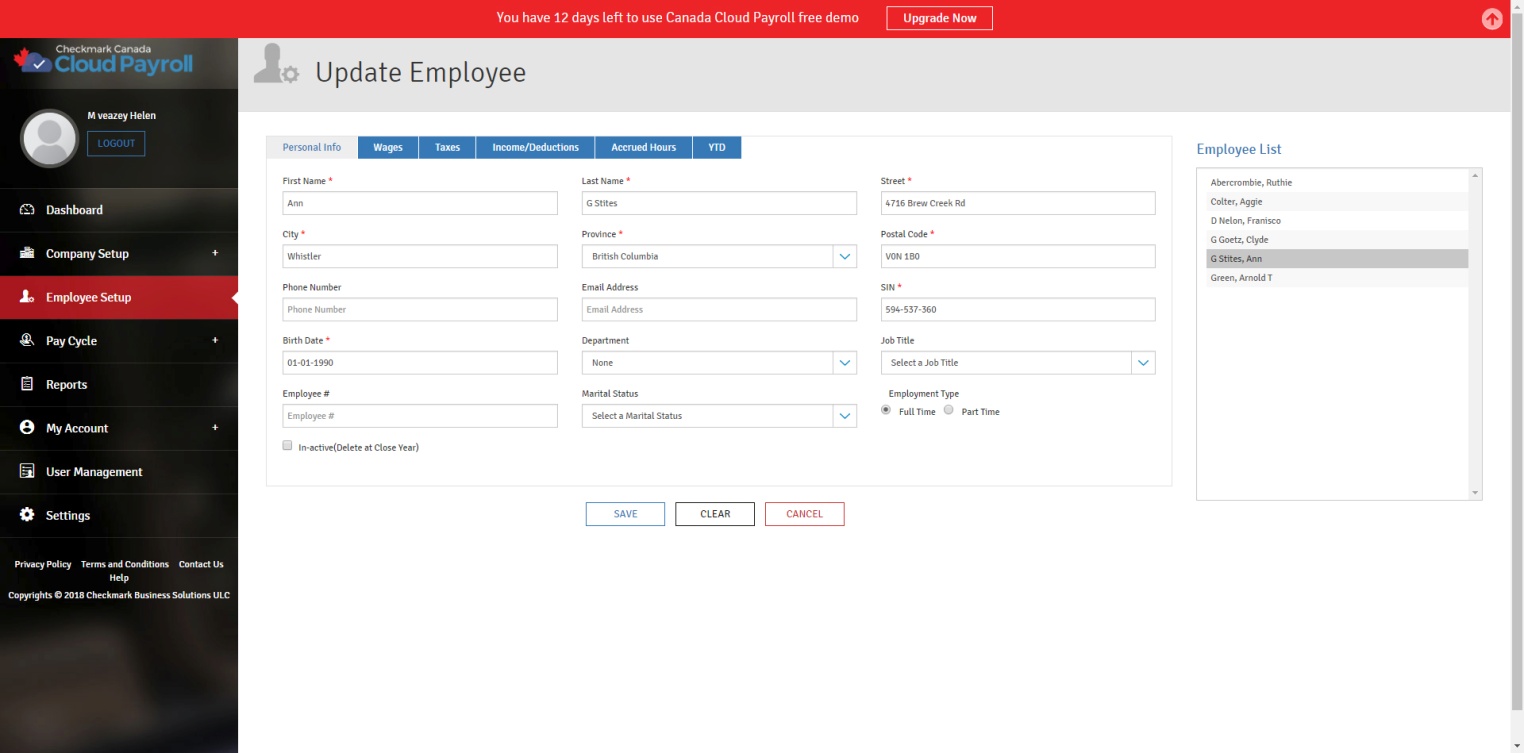
Personal Information Field Descriptions:
First Name: Enter the first name of your employee.
Last Name: Enter the last name of your employee.
Street: Enter the employee’s mailing address (the number and the street name and Suffix). This will appear on the employee’s cheque stubs and T4s/RL1s.
City: Enter the name of the City for your employee’s mailing address.
Province: Select your employee’s Province, from the dropdown list.
SIN: Enter your employee’s SIN (Social Insurance Number).
Birth Date: Enter your employee’s birth date.
Postal Code: Enter your employees postal Code.
Note: Enter the employee’s information (the mandatory fields are marked with a red asterisk) and save. Once the above information saved other information can be given in “Update Employee”
Phone Number: Enter your employee’s phone number.
Email Address: Enter your employee’s email address
Department: Assign a default Department to the employee, from the drop down list, if applicable. The Department assigned here will determine which Department Heading the employee will appear under in lists and reports.
Job Title: Assign a default Job Title to the employee, from the drop down list, if applicable.
Employee #: Here you can assign Employee Numbers which can be alpha numeric. The number will print on the cheque stub.
Marital Status: Select the marital status of the employee, from the drop down list.
Employment Type: Select the employee’s Employment Type, from the drop down list.
In-active
(Delete at Close Year): If you check this box, it will in activate the employee, and then the employee will be deleted when you start the next Payroll Year. This is typically used for
Terminated employees. Once an employee has been marked as in-active, they will show in red on the Employee List.
Direct Deposit: If the employee has opted for direct deposit payment then click on the radio button for Direct Deposit and provide the following information:
Account Holder: Enter the employee’s Bank Account Holder’s name.
Account Number: Enter the employee’s Bank Account Number.
Routing Number: Enter the employee’s Bank Routing Number.
Account Type: Select the type of account, from the drop down list.
Note – You will still be able to print reports for inactive employees before the year is closed, but you will be unable to calculate or create cheques for them. When the year is closed, all of the inactive employees will automatically be deleted from the Company data.